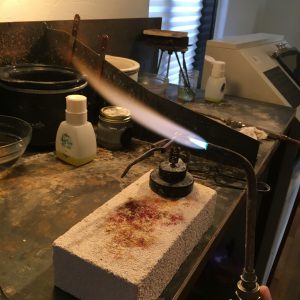
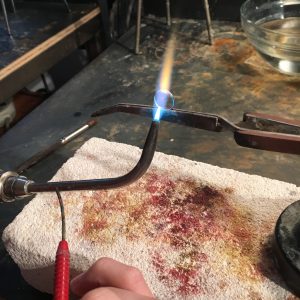
Picking a fuel type for your jewelry studio can be an arduous research session. We've narrowed it down with the pros and cons for each type, with additional information on torch tips included - updated February 2019.
Several weeks ago I was shopping for a fuel source to use for my jewelry bench at home. The butane torch I have was great for small soldering jobs but I needed another heat source for larger jobs, plus I wanted more flexibility with my torch tips. I started shopping around and found it was much harder to find the right torch than I thought it would be. There are so many things to consider when selecting your silver soldering torch tips and fuel type. Here are my findings after careful research across the web.
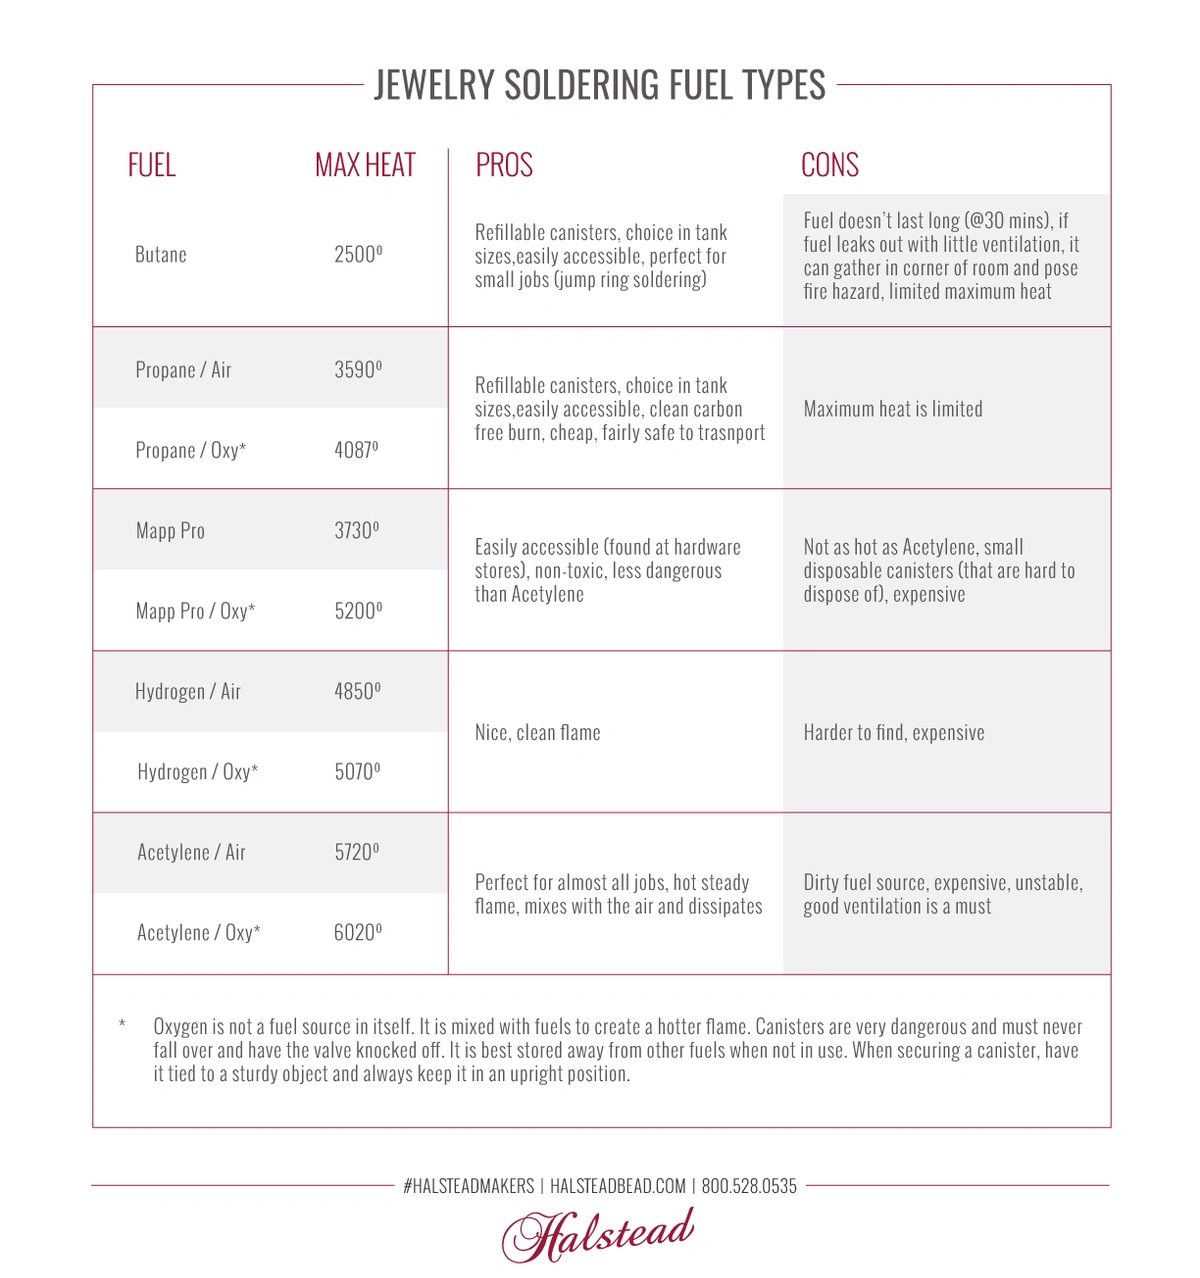
Jewelry Soldering Fuel Types
Choosing which fuel to use in your jewelry studio can be overwhelming. The chart below compares the most common jewelry soldering fuels. When you order fuel tanks in your local area you will need to find a commercial gas vendor. In Northern Arizona, we use a company called Praxair. These suppliers are an amazing resource. They are used to ushering new buyers through a long list of questions to help you safely and effectively set up your space.
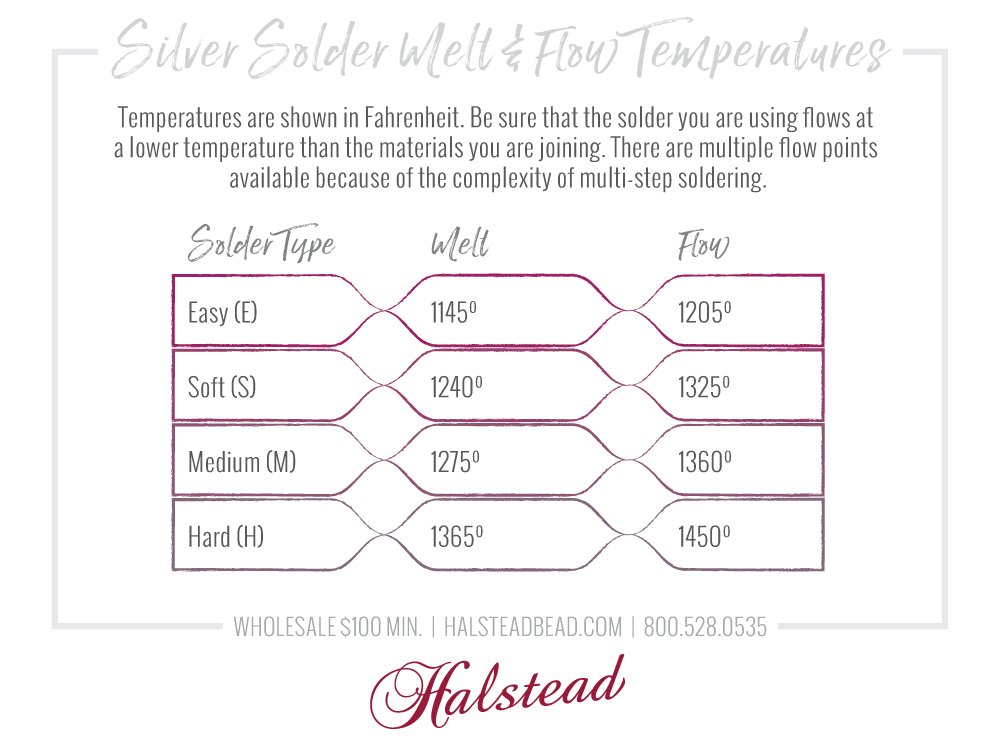
Silver Solder: Melt & Flow Temperatures
It's important to know the melt and flow points of the silver solder you use. Be sure that your fuel source is hot enough to flow the solder. We use silver solder for almost everything we create in our employee studio, so we keep this handy chart available. But, if you use copper, gold or another form of solder, you'll need to know those melt and flow temperatures, too.
Which Torch Tip?
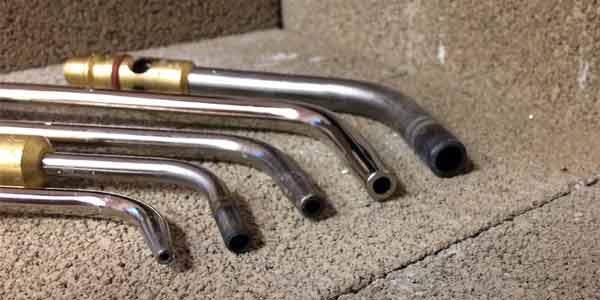
One thing to remember is that the tip is very important when using a torch. We use two separate torch set-ups here in the studio, the Turbo Torch, and a Smith Torch. Both of these companies use their own numbering system for their tips. We have 5 different tips between the two torches. A-3 & A-11 for the Turbo Torch and 00, 1 and 2 with the Smith Torch. They range from smaller to larger tips covering everything we need. Here are the tips we use and why:
Small (A-3 & 00):
These tips are perfect for small jobs like soldering together a jump ring or soldering a bail onto the end of a chain.
Medium (1):
Use for larger-scale soldering such as a large pendant or when you need to heat the entire piece.
Large (A-11 & 2):
This large tip is used for annealing and melting metals.
Torch Tip Maintenance
It's important that you maintain your torch tips. In our employee studio at Halstead, we have an air/acetylene Smith set-up. Every 3-4 months the o-rings found in the torch tip become brittle, cracked or they break. I'm sure the hot dry air we have here in Arizona speeds up the process, but I make it a point to check on the o-rings and replace them if they are beginning to show any wear and tear. I keep a dozen o-rings on hand at a time, so that we never run out. Now you may not need to change out the o-rings as often, but you should still check on them regularly.
Soldering Torch Tips
Depending on the size of the piece, you'll want to use the right tip every time. However, there are other things to consider when using your torch.
1. Heat Sink
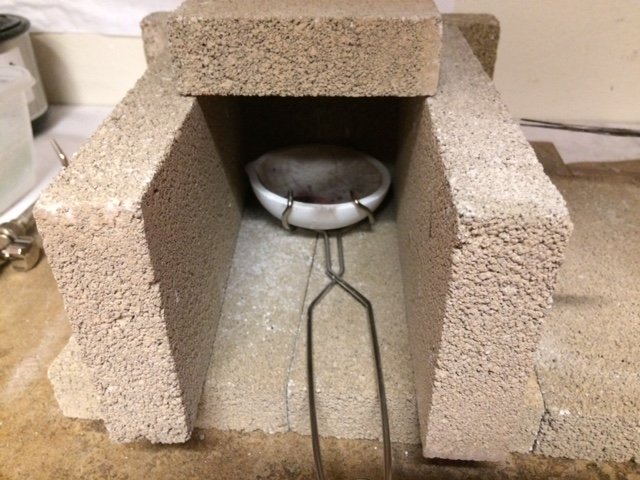
Many items around you will dissipate the heat such as a vise or a tool you are using, this is called a "heat sink". Also, the metal cools quickly. On larger pieces, as you wave the torch tip back and forth across the piece the opposite side is already cooling. When this happens you can reflect the heat back onto the piece by building a simple fire brick container. Try to heat the piece again inside this container and you'll find that you're not losing as much heat as before. This container works well also when melting scrap in a crucible.
2. Flame Size
Here's a great soldering tip:Get in, get out. You want the flame to be hot and big enough to heat the piece up as quickly as possible (without any danger of melting it) for your solder to flow.
Adjust the size and intensity of the flame for the size of the piece. If you are soldering only bezel wire or a jump ring together, and have a smaller tip available, put that on and get in close to the piece.
If you are working on a very large piece, put on your largest torch tip and adjust the intensity to high, to make sure the piece is getting even heat and heating up the piece quickly enough to flow the solder before oxidation happens.
3. Torch Distance
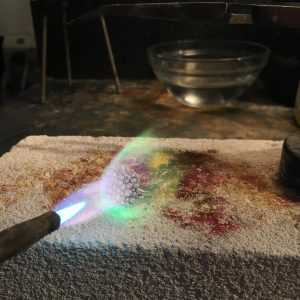
Torch Distance: Torch is close enough so
that the whole flame is covering the piece.
The distance of the torch from the piece to be soldered is crucial and must be adjusted depending on the flame size. When done correctly, this will achieve two objectives: soldering your piece and keeping it clean.
If it's too far away, the torch will only heat up your piece enough to make it dirty. Heat plus oxygen creates oxidation on metal. But the environment of the flame can combat it!
So, try to keep the environment of the flame covering the whole piece until the solder has flowed. The flame prevents oxygen from reaching the metal, keeping the piece clean while soldering.
4. Flame Direction
Here's another great tip when soldering:solder moves toward the heat source. Make sure to heat the jewelry metal evenly and use the flame to direct the solder where you want it to go.
If solder jumps to one side of the seam, that side is getting more heat than the other side of the piece. Move the flame back and forth between both sides to get an even flow.
Thanks to Halstead Preferred Teacher Johanna Harold for providing some of these tips.
I finally chose the propane/air setup at my house. Overall it was enough heat for me with the small pieces that I work on there. Plus, running down to the local store to replace it was a huge selling point for me. Remember, be patient and have fun as you become accustomed to your new soldering torch set up.
If you choose a butane torch, be sure to read this article on Butane Jewelry Torch Troubleshooting.
New to soldering? Watch as I solder with a butane torch to create beautiful sterling silver bangles! I cover bangles from start to finish, including measuring, shaping and texturing.
Further reading for soldering tips:
3 Torch Tips for Soldering Jewelry
Five Steps To Start Silver Soldering
Types of Silver Solder Used in Jewelry
Halstead is one of North America's leading distributors of jewelry making supplies. Halstead specializes in wholesale findings, chain, and metals for jewelry artists.
Got questions? Email our studio coordinator at [email protected]. We'd love to hear from you. Sorry, studio support is not available by phone. Emails only, please.


